TVR Griffith / Chimaera Targa Roof Re-cover

    Download a Word .doc version of this page here (1.46 Mb)

Other Information / resources:

The only other information that I was aware of at the time I re-covered my roof panel was a set of ‘how to’ instructions that can be found on either of the two links below:

http://www.thegriffithpages.com/modifications/exterior-modifications/roof-recover---targa-.html
http://www.squatfrog.co.uk/retrim.htm

I believe they originate from someone on the Pistonheads forum called ‘Rolfe’.  Definitely worth a look as they were very useful to me.

Equipment and cost:

Graham Routledge, GJR, TVR, Griffith, Roof re-cover

[click images to enlarge]

  • Mohair roof material – 1.3 sqr mtrs from http://www.bas-international.com/index.php £67.35 inc. VAT and same day delivery.

  • Glue – Evo-stik Timebond Thixotropic contact adhesive £7.50. Which glue to use was a bit of a headache.  BAS – International have a link for adhesives on their site but I didn’t notice it when I ordered the material.  A local TVR dealer put me in touch with the people they use for upholstery/re-roofing who in turn told me that they just used a trade version of Evo-stik Timebond.  It’s important to use Timebond or its equivalent as you may need to re-adjust the material when gluing.

      " I purchased all my material and glue from BAS international and would recommend that people buy the glue you used (above) rather than theirs as it is an instantaneous contact adhesive. I didn't indentify this until it was to late and have a finish on one side of the panel I'm not happy with. On the plus side BAS supplied enough material that I can have a 2nd go when I get back from LeMans.

      John Wright ( PistonHeads nickname - toon tvr ) "

  • Evo-stik Adhesive Cleaner – to remove the old glue from the roof.  2 x £4.50.  I was a bit heavy handed with this and used two tins, though I’m sure you could get away with one.

  • Loctite Superflex Silicone Sealant (black) – to seal the edges of the material. £4.29

  • Strong thread for stitching canvas – bought from a high street sewing shop.  £ 1.25.  The material from BAS wasn’t pre-stitched at the edges (above the rubber window seal).  This was not as difficult as it might sound and I have added diagrams below, although I believe it is possible to buy the material pre-stitched which would save time and make life easier.

  • Tools used – pincers/pliers, screwdrivers, scalpel/Stanley knife, old scrubbing brush, old paint brush, sander, a few old rags and access to a sewing machine if needed.  It’s also worth being snap happy with a digital camera, especially when removing the old material.  I took plenty of pictures of the seams and joins both before and during the removal of the material as they are useful to refer back to when gluing the new material down.

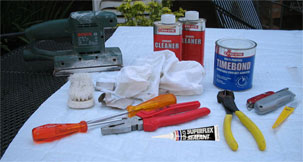
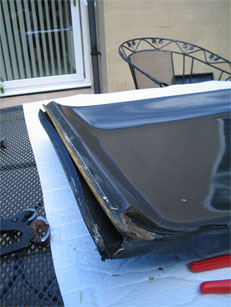
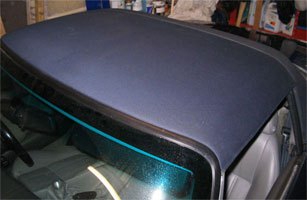
The total cost was around £89 and took two days to complete.

The reason for re-covering:

Graham Routledge, GJR, TVR, Griffith, Roof re-cover

[click images to enlarge]

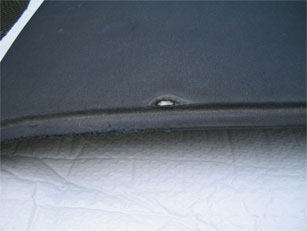
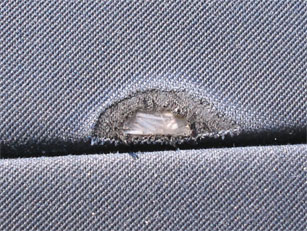
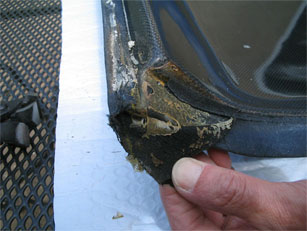
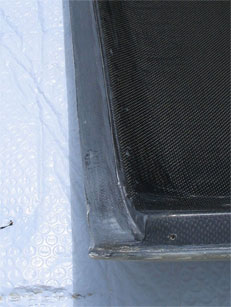
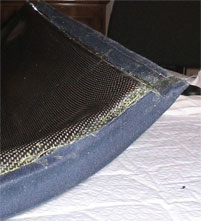
This damage was caused by years of stowing the roof in the boot without putting the panel in its protective cover.  The roof material rubbed against the carpet that covers the fuel tank and the back edge of the panel came up against the left hand side boot hinge.

After removing the rubber window seals the runners which hold the rubber seals had to be removed.  Again, this is where a camera is useful.  The driver side runner had two washers beneath it so that the rubber seal would make better contact with the glass.  Any indication of the positions of these washers was lost after the panel had been cleaned prior to gluing.


Graham Routledge, GJR, TVR, Griffith, Roof re-cover

[click images to enlarge]

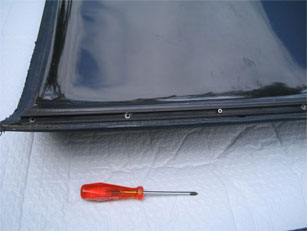
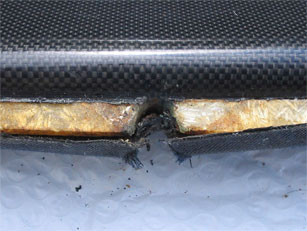
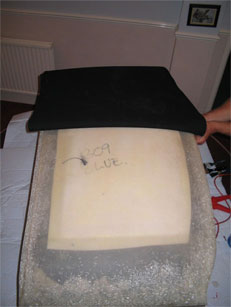
The next step was to use a flat edged screwdriver to gently lift the seams and glued down edges.  Be careful not to put too much pressure in the wrong place when you leaver the material up with the screwdriver.  The fibre glass in some places around the edge is pretty thin and could snap or crack if you’re too heavy handed.  Once the material has been lifted enough to pull at with your fingers you can then use pincers or pliers to get a stronger grip on the material to peel it back.


Graham Routledge, GJR, TVR, Griffith, Roof re-cover

[click images to enlarge]

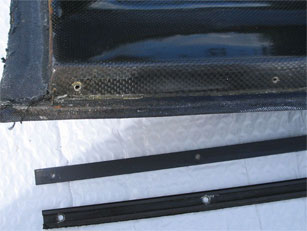
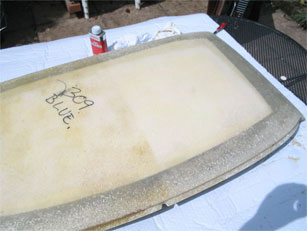
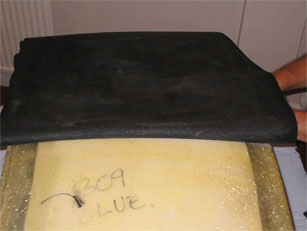
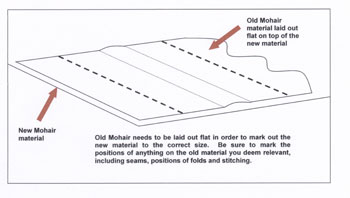
Work around the panel until the material is no longer attached to the edges, removing the old black sealant as you go.  With the edges done flip the roof panel over and peel the rest of the material off.  If at all possible, and depending on the condition of the material being removed, try and keep the old material in one piece.  If, like mine, the new material isn’t pre-cut and stitched you may need to use the old one as a template.

With the old mohair off you now have to remove the glue that has been left behind.  As mentioned in the instructions I used, this part of the job shouldn’t be rushed.  The last thing you want when the new material is on are little lumps of the old glue showing through spoiling the smooth surface of the finished roof.  In addition the new glue will not bond well on top of the old glue.  So this part requires adhesive cleaner, rags and some elbow grease.  If you can, do this out doors as the fumes are quite strong, the same goes for gluing too.


Graham Routledge, GJR, TVR, Griffith, Roof re-cover

[click images to enlarge]

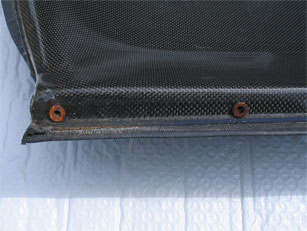
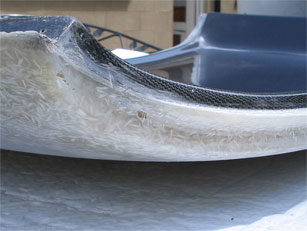
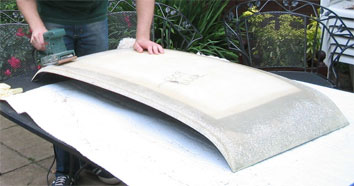
Apply the adhesive remover with one rag or cloth rubbing in as you go, then wait a few seconds for the remover to do its stuff by breaking down the bonds of the glue, then use a second cloth to rub the glue away.  I found that a nylon bristled scrubbing brush was useful for getting into the groves.

Once the old glue has gone give the panel a light sanding, and I mean light, you don’t want to create any flat spots.  Sanding helps to remove any remaining adhesive that might have been missed and also lightly scratches the surface of the fibre glass.  This creates a rough surface and increases the surface area for the new adhesive to grip to.  Once the top surface is done flip the panel over again and lightly sand by hand the areas where the material is to be glued on the under side.  Again this is where photos of the panel before you started are useful, showing you just where you old material finished.  When you’re done sanding use a damp cloth to wipe off any excess dust and the panel will be ready for gluing.

Since the new material had not been pre-cut and stitched it was necessary to use the old mohair material as a template.  Un-pick the stitching on the edges and using an iron on a low temperature iron out the bump’s and ridges of the old material.  Lay the new mohair on a table, then place the old material over the top.  Orientate the old material until the grain/direction (bias) of the mohair is in line with that of the new material.  You can refer to the close up picture of the damage (above) on the old mohair, or click here to understand what I mean by grain/direction of the material.  Once in position, mark round the old mohair with chalk or similar so that its outline is left on the new material.  When you are happy that all is well, cut the new material to the shape of the old.  If you are at all worried your marking out is not spot on, just cut wide of the mark.  You can always trim off any excess later.

There are some diagrams at the end of this document to aid with the stitching.

As my material had not been pre-stitched it was necessary to mark the positions of the stitching and the fold at the outer edge.  The picture below shows the outer edge in question.  With the stitching of the old mohair already un-picked the seam could be laid out flat and marked on the new material.  BUT be aware that the edge of the roof is actually a slight curve so don’t mark it out as a straight line.  When the fold line has been marked, use a warm iron to create the fold in the new mohair.  This can then be laid over the roof panel to check that the fold is ok before stitching.  The stitching is approximately 5mm from the outer edge and can be done with a home sewing machine.  If you are not confident to do this yourself and you don’t know anyone who would do it for you I’m sure you could take the marked out material to a cobblers or upholsterers who could do it for you.


Graham Routledge, GJR, TVR, Griffith, Roof re-cover

[click images to enlarge]

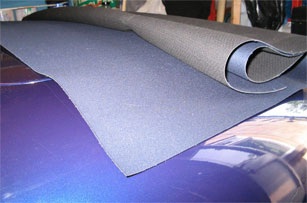
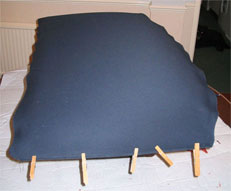
With the material now cut to shape and stitched lay it out over the roof panel.  It’s important to get the material in the correct position before gluing so check and re-check it’s in the right position.  The mohair has some ability to stretch which is helpful if you think it might be a tight fit.  When you’re certain it’s positioned correctly clamp one end.  I found ordinary wooden pegs to be fine for this.  Gently fold back the un-clamped end of the material taking care not to let the material creep or shift and start to apply the adhesive with an old paint brush on both the fibre glass panel and the back of the material.  It’s helpful at this point if someone can hold the material making sure it doesn’t move while the glue is applied.


Graham Routledge, GJR, TVR, Griffith, Roof re-cover

[click images to enlarge]

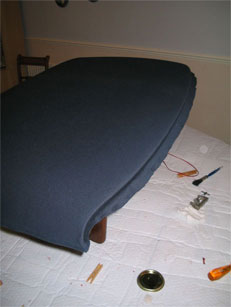
Gently bring the material back over and position correctly before smoothing flat.  Always smooth from the middle of the roof outwards so as not to trap any air bubbles.  If the material doesn’t lie perfectly the first time, don’t worry, as long as the glue is Timebond you’ll have time to lift and re-position the material.  Repeat on the other side.  I just used my fingers to push and mould the material into the curves and groves of the panel.  When finished with the top, flip the panel over and apply the glue to the material and appropriate areas of the panel underside.  Fold the seams into position pressing and smoothing firmly.


Graham Routledge, GJR, TVR, Griffith, Roof re-cover

[click images to enlarge]

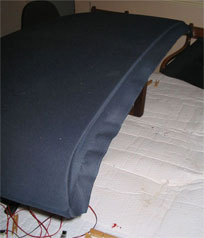
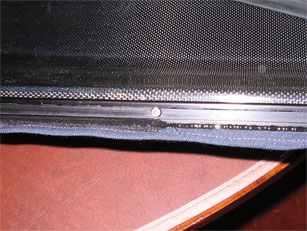
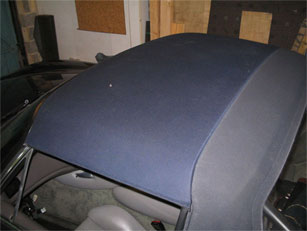
Once the glue has set gently remove any excess and over hanging material.  Re-attach the window seal runners that were removed at the beginning and apply the silicone sealant around the edge of the material, including where the material meets the window seal runners.  The sealant not only keeps water out but also helps to stop the mohair from peeling and fraying at the edges.  Leave the sealant to set, insert the rubber window seals and the roof is finished and ready to use.

Remember the new mohair will need to be waterproofed before use in wet weather.


Graham Routledge, GJR, TVR, Griffith, Roof re-cover

[click images to enlarge]


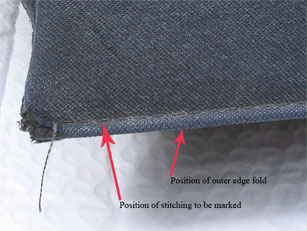
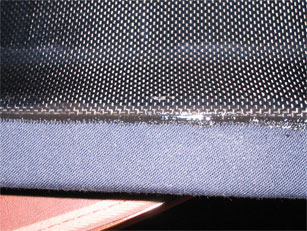
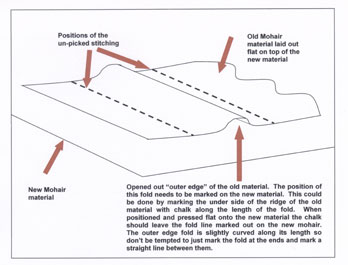
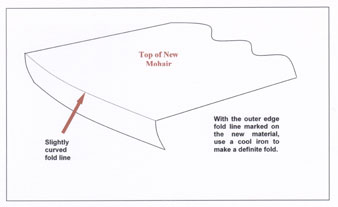
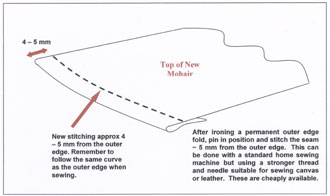
Basic Guide to Outer Edge Roof Material Stitching

Graham Routledge, GJR, TVR, Griffith, Roof re-cover

[click images to enlarge]

[Back to Page Top]


© G J Routledge 2006 - Last updated November 2006